Active Directory Part 2 - Common Tasks
Common Active Directory Tasks
Creating New Organizational Units
The way organizational units are set up can look different from one network to the next. From what I have read, OU creation should be based on how group policy objects need to be assigned to specific AD objects. For example, maybe the OU labeled “HR Department” needs a group policy object made specifically for delegating resources that only “HR” needs to access. It’s also best practice to try to keep your OU structure as simple as possible. Complex structures may be difficult to reverse or change in the future.
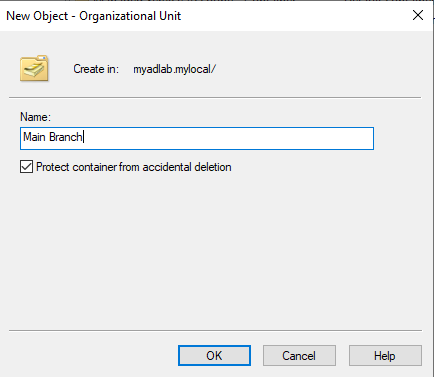
In my homelab, I made up a fake scenario where my organization needs an organizational unit for its main office branch. So I created an OU named ‘Main Branch. To do this, I opened the ‘Active Directory Users and Computers’ tool.
Server manager > ‘Tools’ tab > ‘Active Directory Users and Computers’.
Then I right clicked on my domain, clicked ‘New’, and clicked ‘Organizational Unit’ (shown below).
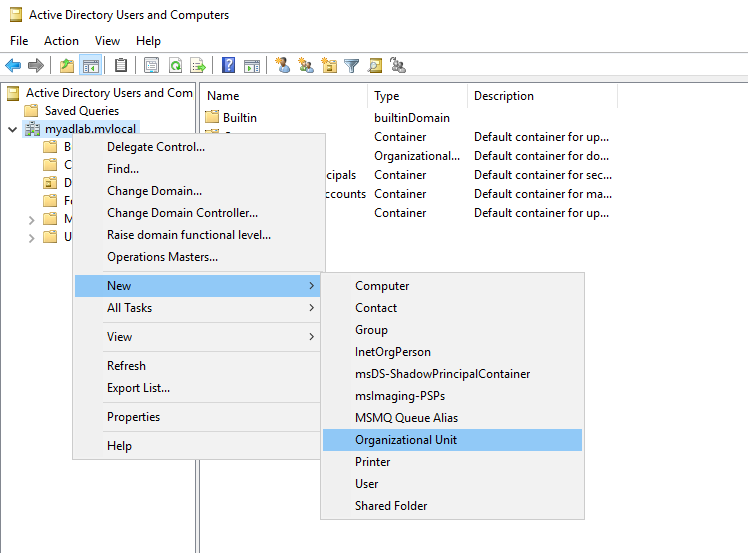
I named it ‘Main Branch’.
The main consensus I found in sysadmin forums and YouTube tutorials is that user accounts and computers should always be kept in separate OUs. Therefore, I created two OUs for each group.
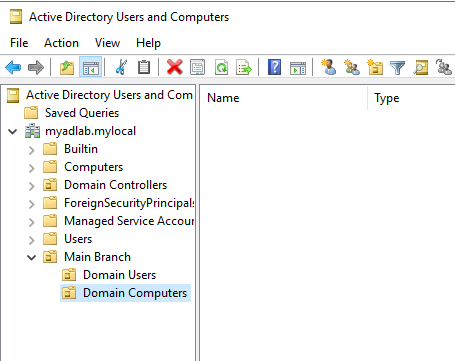
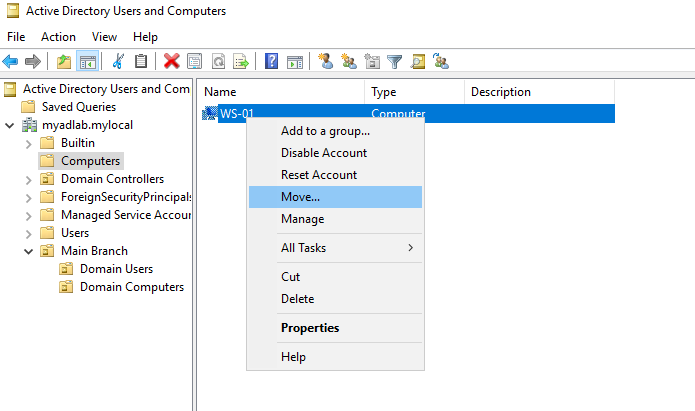
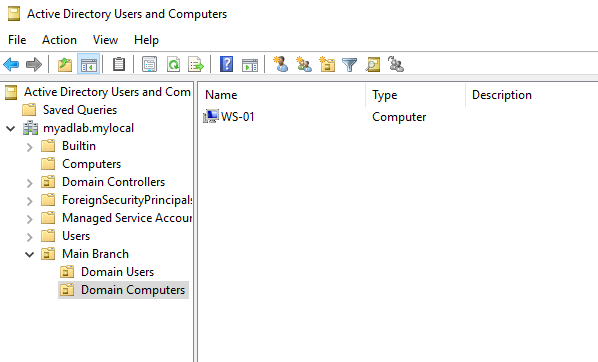
Next, I moved the one computer I had connected to AD from the ‘Computers’ container to the ‘Domain Computers’ organizational unit I had just created.
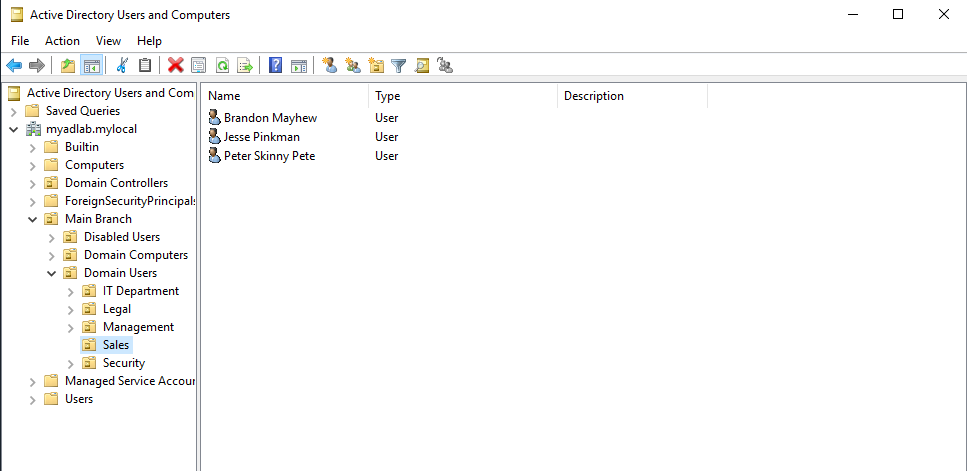
Now I need some users for the Domain Users OU.
Creating User Accounts
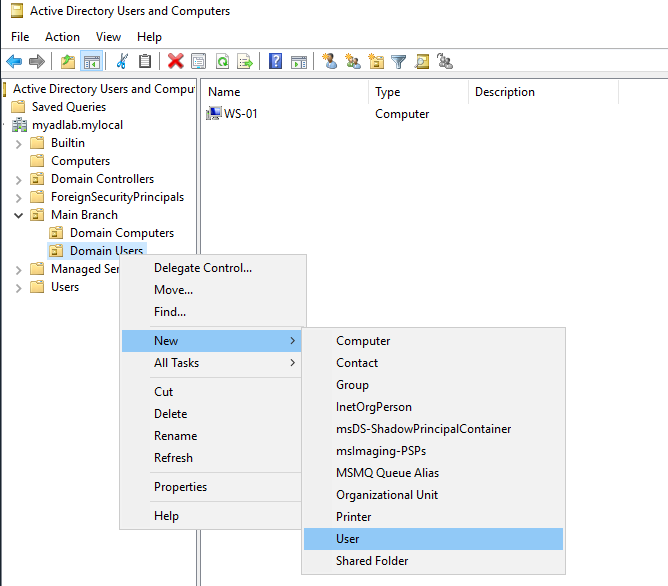
Creating new user accounts is a common task for admins that work with Active Directory. To create a new user, right click on the OU that you want to store the user in, and click New > User.
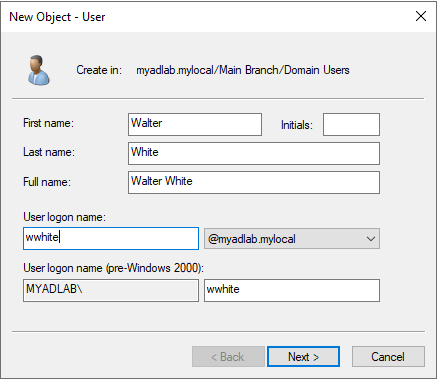
Next, fill in the user’s basic information. Note that it’s also important to follow a specific naming convention for usernames. It also gives you the option to choose which domain to assign it to, so make sure you assign the correct one.
Example: flast@domain.local (first initial, last name, all lowercase).
Now set the password and set the password policy. (Password policies should really be managed by Group Policy Objects but we can also do it here).
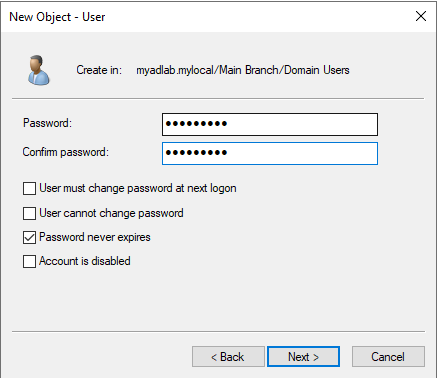
After that, review the user information and click finish.
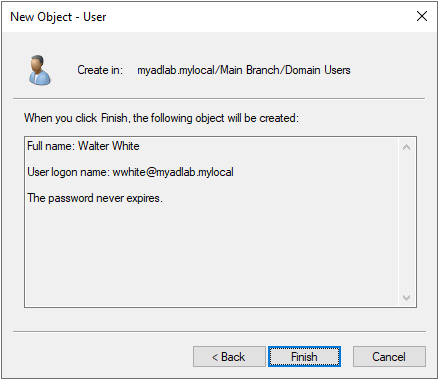
Now we can see the new user in the OU and we can finally log in a computer using an actual domain user.
Below is a screenshot of the computer ‘WS-01’ where I logged in using my new domain user account.

Resetting Passwords
One task admins will definitely encounter daily is password resets. People forget passwords all the time, so it’s important for every entry level IT professional to know how to reset them properly.
Steps:
- In the “User and Computers” tool, use the search feature to search the users name.
- When you find the user, right click and check the user’s properties to verify that is the correct user. You can ask the owner to repeat their username to you to verify it’s correct. You never want to reset the wrong user.
- Set up a temporary password for the user and check the box that forces the owner to change it at next logon.
- Send the temporary password through a secure communication channel. This is usually done through email.
- The user should now be able to create a new password for their account.
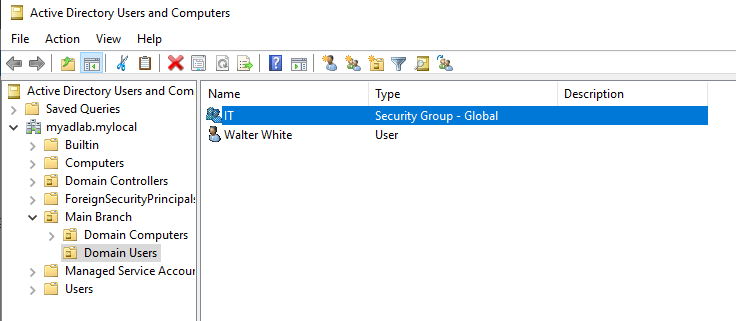
Managing Groups and Memberships
Groups are a little different from Organizational Units. As I mentioned before, OUs are meant for organizing the directory to deploy Group Policy Objects (GPOs). It’s common to create OUs for an organization’s departments or office branches. Groups are mainly used for assigning rights and permissions to User and Computer objects.
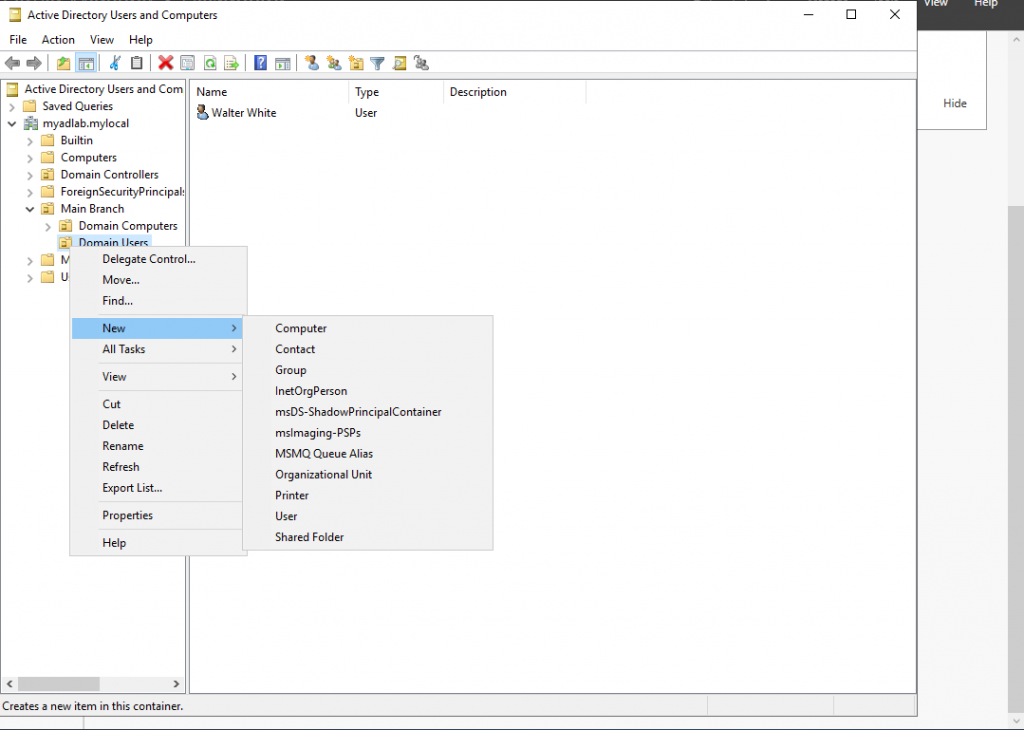
To create a group in Active Directory, first open the “Active Directory Users and Computers” settings. Then right click the Organizational Unit or existing Group that the new group will live in. In my case, that is the “Domain Users” OU I created before. Hover over “New” and click “Group”. A “New Object” window should appear.
Types of Groups
When creating a group, you will be prompted to choose a group type. There are actually two types of groups that can be created. Security groups and Distribution groups.
- Security Groups: These are the groups we mostly think about in Active Directory. They are for assigning rights and permissions to a collection of objects. Any user or computer inside of a group will inherit the rights and permissions of that group.
- Distribution Groups: These groups have a completely different role. They are used by email systems, like Exchange, to send emails to groups of email recipients. They work kind of like mailing lists.
Group Scope
You will also be prompted to choose the group’s scope. You get three choices: Domain Local, Global, or Universal.
- Domain Local Groups: This group scope is limited to the domain where the group exists. It is mostly used to assign permissions to resources within the same domain. It can include members from the same domain AND members from other domain within the forest.
- Global Groups: This scope can give members of a group access to resources in a different domain, as well as the same domain (as long as their in the same forest). Global groups can only contain members from the same domain.
- Universal Groups: This scope extend across multiple domains within the same forest, as well as some domains inside trusted forests. Members can be included from any domain from the same forests. The caveat for using universal groups is that they have to be replicated to the Global Catalog. This can increase traffic within the network.
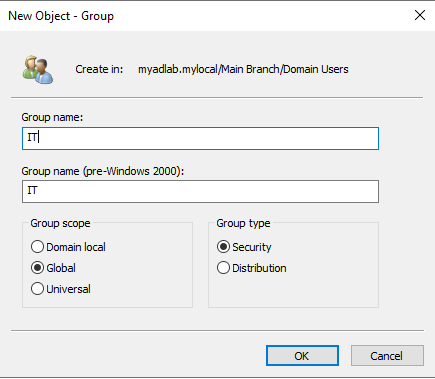
In my case, I chose to name the group “IT”, chose the “Security” type, and chose “Global” for the scope.
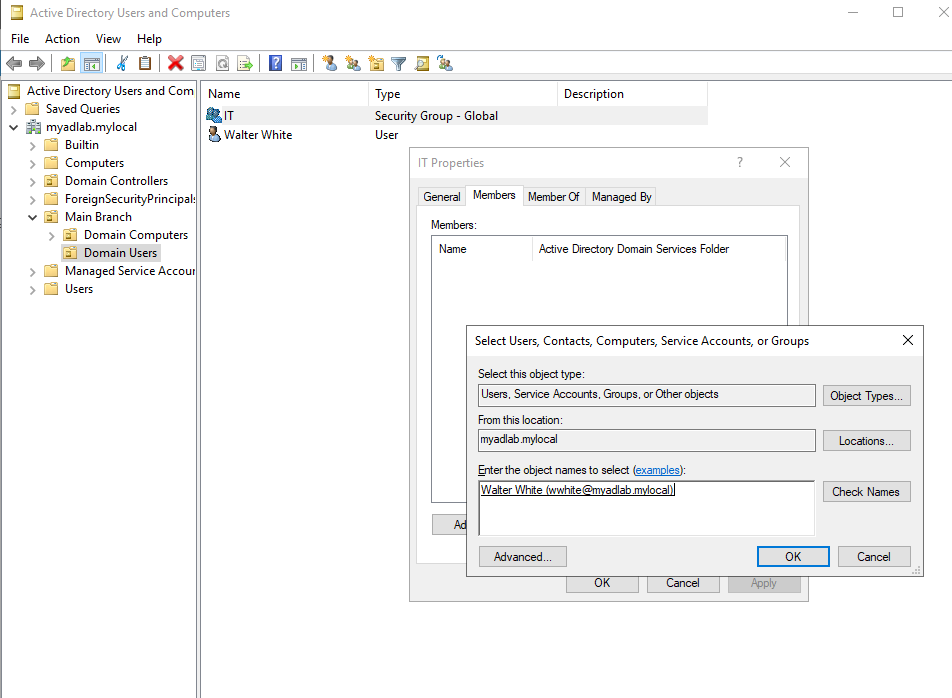
Adding Users to a Group
Groups need members. Here’s how to add a user to the group we just created:
- Right-click on the group you want to add a user to. Click Properties. Then click on the “Members” tab and click the “Add…” button.
- Under “Enter Object Names”, enter the user’s full name or username. Then click “Check Names”, which should autocomplete the entry. Then click “Okay”.
- Click “Apply” to the Properties window, then “Okay”.
- Your user should now be part of the new group.
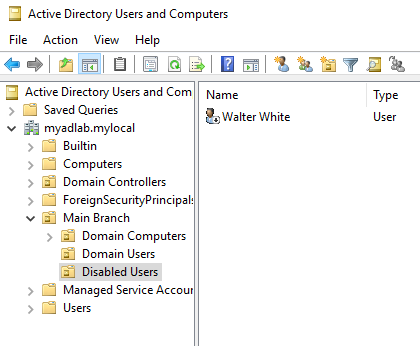
Disabling Accounts
Just like creating new users, removing a user’s access to the network is also an important day-to-day job for a domain administrator. Whenever an employee gets terminated or quits, their access to the network needs to be revoked in order to prevent security risks. Although the employee is gone, it is also important to not delete the user object for reasons such as auditing, data retention, or even the chance of that employee getting rehired. The best option is to simply disable the account for a certain amount of time, rather than delete it.
Steps to disable user accounts:
- Create a new organizational unit called “Disabled Users”.
- Find the user you want to disable, right-click on it, and click on “Disable Account”. An alert window should appear and say that the account is disabled.
- Finally, move the disabled account out of its original OU, and into the newly created “Disabled Users” OU. You can simply drag it, or you can right-click and choose the “Move” option.
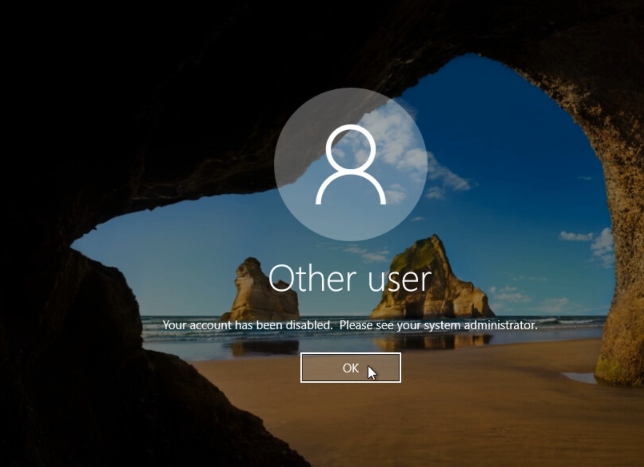
At this point, the user should not be able to log in anymore. If they try, they would see the message shown below.
Group Policy Objects
Group Policy is a tool that helps IT administrators manage user and computer settings across a network. Think of it as a way to enforce rules or configurations for multiple devices at once, like setting up default wallpapers, blocking certain applications, or managing security settings. It works by linking ‘Group Policy Objects’ (GPOs) to Organizational Units, which then apply those settings to the users or computers in those OUs. This makes it super efficient for handling large networks because you don’t have to configure settings on each device individually. It’s all centralized.
Creating and Linking Group Policy Objects
Tools like PowerShell and Command Prompt (CMD) are powerful command line interfaces that IT administrators utilize to perform their duties. It’s important that the correct users have access to those tools, but for other types of users (non-IT accounts), access to these tools maybe introduce risks to the network. Employees in the Sales department should not be making their own changes or running scripts on their workstations. Their accounts could also be compromised through phishing campaigns or other methods. That is why tools like PS and CMD should be disabled for most users in a domain.
The problem is, there may be hundreds or even thousands of users in a domain that will require changes in their settings. Making these changes one by one would be daunting, so that is where Group Policy comes in.
In my lab, I went ahead and created a few more organizational units representing some of the ‘made-up’ organization’s departments: Sales, Legal, Management, and Security. I also created new users for each department.
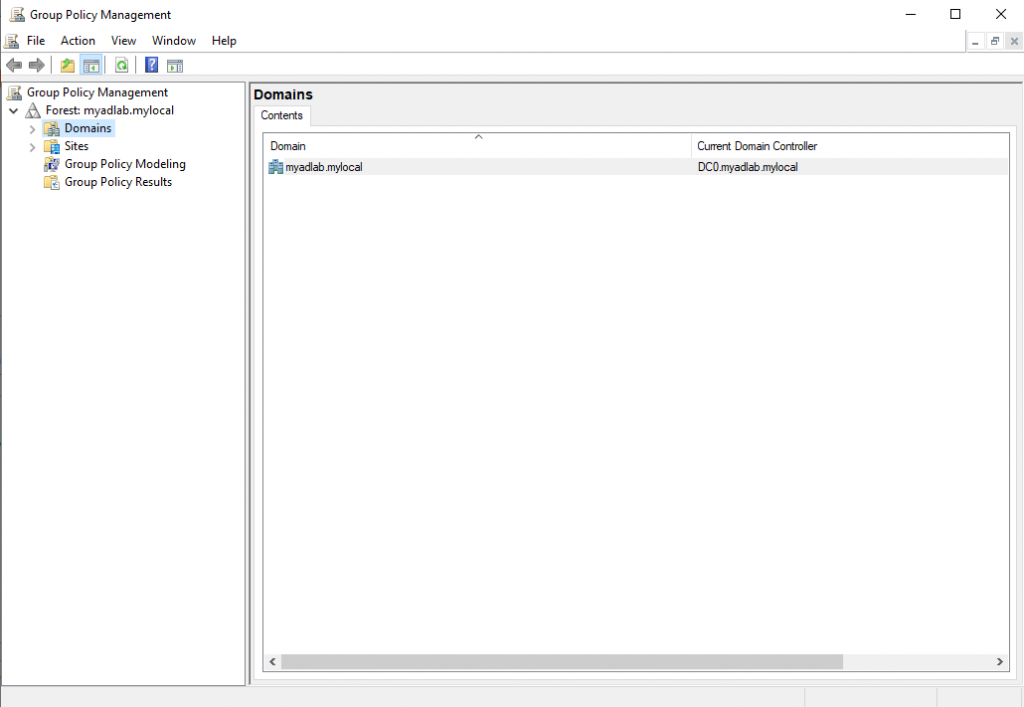
Let’s say I was assigned a task to disable both PowerShell and Command Prompt for all users in the Sales Department. To do this, I first need to open the ‘Group Policy Management’ tool. Using the Server Manager, click on the ‘Tools’ tab, then click ‘Group Policy Management’ in the drop-down menu.
Once GPM is open, navigate to the organizational unit where the Group Policy Object needs to be applied.
For me that’s Forest > Domains > (my domain) > “Main Branch” OU > “Domain Users” OU > “Sales” OU.
Right click on the OU, and select “Create a GPO in this domain and Link it here”.
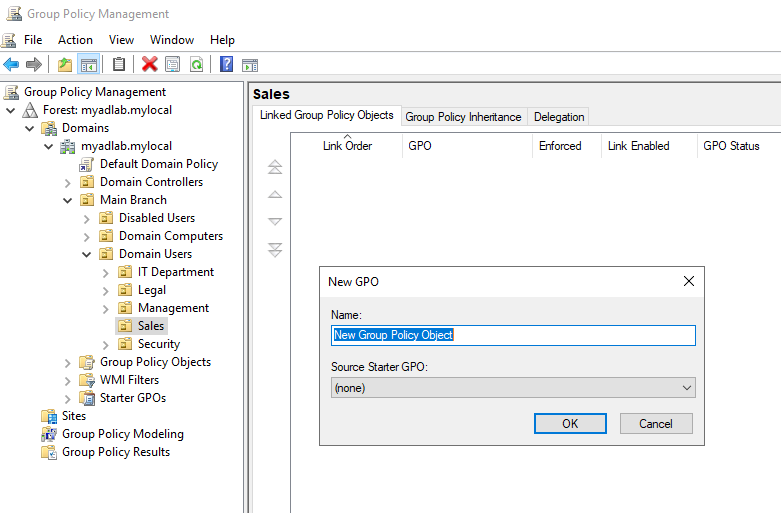
Name the GPO whatever you like, maybe “Disable PowerShell and CMD”. Then click OK.
Next, right-click the GPO and select “Edit”. This opens the Group Policy Management Editor.
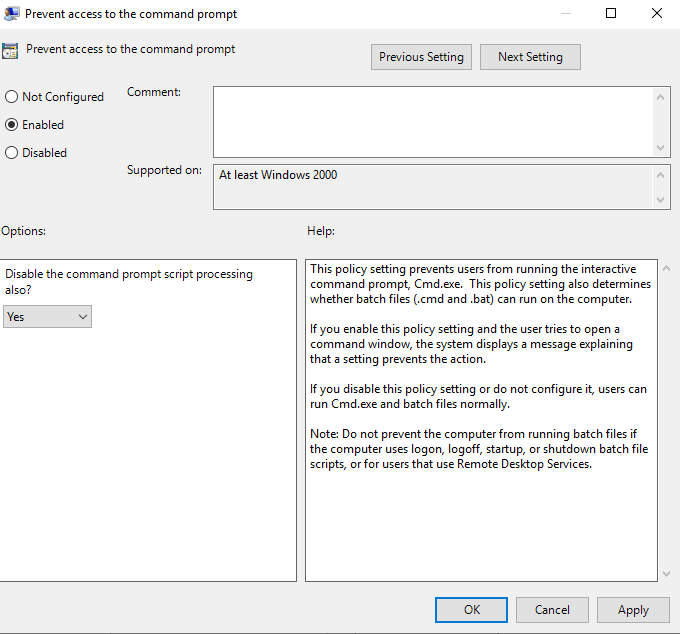
Navigate to: User Configuration > Policies > Administrative Templates > System. Then double-click on “Prevent access to the command prompt”.
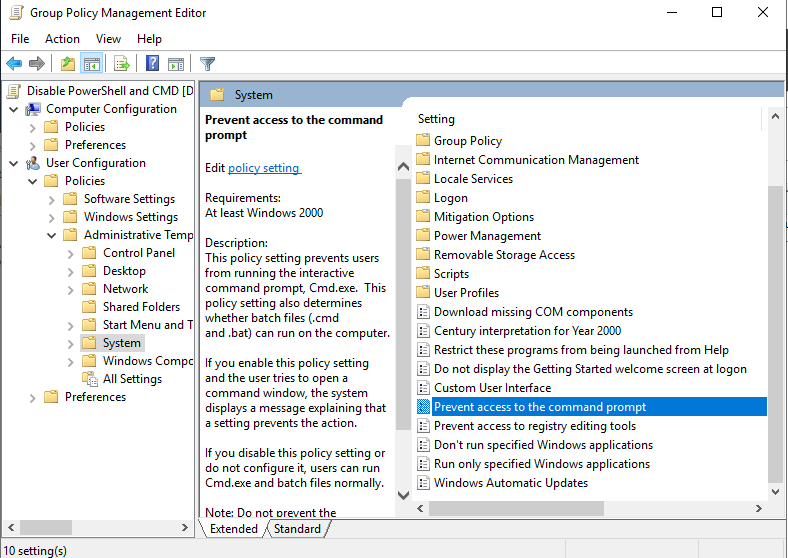
Select “Enabled”, and in the “Options:” section, set “Disable the command prompt script processing also?” question to “Yes”. Click “Apply” and then “OK”.
Now we disable PowerShell by adding the policy called “Don’t run specified Windows applications”. It should be located in the same place as the last one:
User Configuration > Policies > Administrative Templates > System
Again, once you find it, double-click on it and select “Enabled”. Under “Options”, click the “Show…” button and add the following entries:
- powershell.exe
- powershell_ise.exe

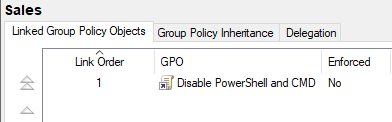
After that, click “OK” and then apply the settings like last time. Now the GPO should be linked automatically, but you can also do this manually for other OUs by right-clicking the OU and clicking “Link an existing GPO…”.
Group Policy Objects do not take effect immediately. It could take anywhere between 30 to 120 minutes for that to happen. You can force a Group Policy Update by entering this command in CMD as the Domain Administrator:
1
gpupdate /force
Finally, we can test our new GPO by booting a workstation and logging into an affected user.
After logging into a user account in “Sales”, I tried to open Command Prompt and got this message:
PowerShell also does not open at all. Therefore, I can say that this Group Policy Object did its job.
Order of Precedence
Sometimes multiple Group Policy Objects will be influencing the same setting. This conflict forces one GPO to take precedence over (or ‘write-over’) the rest, based on a specific “Order of Precedence”:
- Local Group Policy (least significant)
- Local GPOs are the “first applied” GPOs and are least important.
- These are configured locally on each Windows computer, and are usually only used if not connected to the domain.
- They are only applied if there are no other applicable GPOs that are considered “more important”.
- Site Policy
- Next, Site GPOs will write-over Local GPOs, as they are considered more “important” or “significant”.
- Domain Group Policy
- GPOs applied and linked to the domain.
- They take precedence over Local and Site GPOs.
- Organization Unit (Parent)
- GPOs applied and linked to an OU.
- Over-write domain, site, and local GPOs.
- Sub-Organizational Unit (Child)
- GPOs applied to sub-OUs will take precedence over any GPO applied to its “Parent” OU.
- Enforced GPOs (Most Significant)
- Most significant ‘level’.
- Any GPO with the “Enforce” option checked will take precedence over anything else.
- This means that if a ‘Local’ GPO is ‘enforced’, it can take precedence over GPOs in “more significant” levels, as long as they are not “enforced”. If two GPOs from different levels are set to “enforced”, then their precedence revert back to the previous rules.
Other Factors for Precedence
If two GPOs are both enforced and linked in the same ‘level’ (making them tied), then these could be possible tie breakers:
- Computer vs User GPOs
- GPOs under the ‘User Configuration’ category are more significant and take precedence.
- ‘Computer Configuration’ GPOs are less significant.
- Blocked Inheritance Option
- If an OU has the “blocked inheritance” option checked, then any GPO applied to a higher level (like the domain) will not take effect.
- Blocked inheritance still gets canceled out if a GPO is “enforced” in the parent OU, domain, site, or local levels.